Hey Kessy: Better and Brighter Party

July 31, 2016 – UP Town Center, Quezon City

I woke up early as usual (shoutout to fellow morning persons!) and felt the sudden urge to work! In a little less than a month Twine + Sunshine is going to participate in a bazaar and honestly it makes me ABSOLUTELY NERVOUS. Anyhow, I’ve been waiting for this event to come because 1) f r e e art materials 2) I’ve seen how Hey Kessy started out since I accidentally discovered Mansy Abesamis’ blog a few years back, when she was blogging about experimenting with her papercutting and had a different day job, ’til she opened her little shop at Esteban Abada, a back street in Katipunan and now they’re in UP Town! Amazing.

header.jpg
Photo credits: Hey Kessy’s FB Event

If that’s not swoon/IG-worthy I don’t know what is. #aesthetic

So there, I woke up early as usual and hauled my butt to UPTC really early. As in, ako nagbukas ng Starbucks early haha. It was all because I got bit by the workaholic bug (please bite me more often).


Here are some of the finds I saw. Pardon the quality, there were a lot of people and taking photos makes me shy :(image

Wooden boxes! Wished I tinkered with this one, but I believe they have a switch and light up!


imageThere was an entire table for local paper goods. Look at those watercolor cards from Arlene Sy. I want them SO BAD. Hey Kessy also got a cake from Red Ribbon, and I think someone taste tested the icing hahaha.

imageMore pretty stationery! My interest got piqued by that beer soap over there. I have a couple of friends who’d probably like it ;)

imageDetails Ink products!

imageI tried taking a picture of the really cute poster. Emphasis on tried, and that I really should be less shameful of taking photos for the blog.

image

Sunday Paper, one of my absolute fave notebook brands and they’re local! I even recommend them in my calligraphy supply master list.

imageSharpie also had a giant coloring station!

image

Pardon the focus (or lack thereof), but this shelf has lots of ink, paint, and other watercolor supplies!


image

Stamp pads, in a lot of colors.

image

image

image

image

Told you the place was packed.

image

image

Congratulations to Hey Kessy for such a wonderful event!


image

This is one of the two things I bought from Hey Kessy, and I think I actually have one of these already, although with fewer colors. Look at them! They look just like an eyeshadow palette. Joanne and I have this inside joke because she has a makeup bag that’s full of brush pens instead of eyeliners. Am I the only one who thinks art supplies look like make-up?

Shout out in the comments if you want to see all my paint! So I could feel better about hoarding them. Huhu.


Ramen Nagi Review: Ramen virgins

Ramen Nagi- Robinson’s Magnolia

image

I am not a ramen fan. In fact most of my ramen memories are only connected with instant ramen reminiscent of weekday afterschool meriendas. I tried Ramen Nagi because my boyfriend insisted to eat somewhere else other than Yabu. Hehe. We’ve never eaten here (or any other ramen place for that matter). We ended up here because of its good zomato reviews. I tried the Black King Chef’s recommendation while he tried the Red King Chef’s recommendation.

image

What I liked about Ramen Nagi is you can customize your ramen as you like. For a ramen noob like me though, it felt overwhelming so I just chose chef’s recommendation.

image

I chose Black King because it piqued my curiosity. It’s not everyday you get to see and eat black ramen. From what I understand, their ramen starts with a standard broth and they just adjust depending on if you want Black, Red, Green or White king. Black King uses squid ink and is seafood-based while Red King is also about the spiciness.

image
Red king

Red King is a bright, fiery red soup that is very spicy, even for people like us who like things super spicy! The soup burns your throat but after the initial spiciness their soup base permeates the tongue with a mildly sweet flavor. The noodles were firm and well cooked. The meat was very tasty. The same is true for Black King as well, but instead of spice, it tastes very much like seafood. If you’re a fan of squid then you’ll surely like this. It was okay for someone who generally dislikes seafood.

What we both disliked was the meatball that crumbles easily. It wasn’t the texture that was the probably rather the sweet flavor that seems to overwhelm the ramen’s flavor. I think it was used to balance out the flavor from the broth but as someone who doesn’t like sweet tasting meats in general, I wasn’t very fond of it.

image

That being said, the customer service was excellent! They have responsive and courteous servers. Average waiting time. The place was clean.

The price range was 410 per bowl. Was it sulit? Yes because halfway I was already full, maybe the prices could be lowered though, but it does seem to me that they really use high quality ingredients.

*they have service charge btw

Verdict: 7/9 (using the 9-point Hedonic scale)

The college student’s guide on lettering/calligraphy on the cheap

I say college student, but really, anyone who wants to save a few pesos for this hobby can use these tips.

Calligraphy is thought to be an expensive hobby, and it is, but only if you’re not aware of the things you buy. There are a lot of cheap options you can use that won’t break your budget!

1. Use little jam jars or little plastic containers for ink instead of dinky dips.

I love dinky dips and how easy it is to use with an oblique holder (don’t know what that is? click here!) but they’re not exactly cheap and I don’t have the budget for it, so I use these little jars (P10 each) to hold small amounts of ink. I also bought these plastic containers from Daiso (P88 for 8) which you can put in a mound of modeling clay so they don’t move. I do wish they were screw cap types. I also bought little tiny jam jars from Divisoria for around 5 pesos each (or were they 10? I forget.)

2. Use gouache instead of buying colored ink.

Gouache is basically opaque watercolor, and I use them for practice or on dark paper instead of using colored ink because 1 set of gouache paint (18 colors if I’m correct) is equal to 1 jar of calligraphy ink. Of course, the consistency and properties vary, but they do the trick especially if all I want to do is practice my strokes.

3. Use brush pens for calligraphy practice.

Brush pens (the felt tip kind) are basically markers with a special tip that allows you to do thick and thin strokes. Although you can’t achieve super thin lines like in calligraphy, the hand motions are similar enough to help you improve. They’re also very portable so you can practice everywhere. (Or if you’re like me, you can look like you’re taking notes in class when you’re actually doing some letterforms.)

The ultimate combo:

Water brush + watercolors + paper = WINNER.

4. Use your old readings as scratch paper.

Save money and save the earth! With the right amount of water in your paint, the paper won’t wrinkle as much as you paint, but this still largely depends on the type of paper. Watercolor paper can get expensive, so using scratch paper saves the earth AND it’s great for practice.

If you really want to start doing lettering but your budget is very limited, consider buying just these three things: 1) water brush, 2) watercolors, and 3) watercolor paper. With just these three in your fingertips, there is already a wide range of colors, styles, and projects you can do with them. You can even use them for painting and not just lettering!

(not-so) Happy Hell Week!

Let’s keep this short and simple so you guys can get back to your readings/plates/papers/formal reports/etc. yes?

acads before lakads calligraphy

Yup, that’s right, even the internet is reminding you to go study. You can do it, punch that hell week in the gut! (Metaphorically.)

Also, the image is in hi-res, so if you so happen to want to download it (It’s currently my desktop wallpaper) you can download this fabulous calligraphy quote on hell week here for absolutely FREE: http://bit.ly/1E3yCBq or, you can give us some lovin’ on Facebook and Instagram as payment :)

Calligraphy by Celz Alejandro ☼

Hair Dye Chronicles

Heyo! It’s Adi again.

I don’t know about you, but I’ve seen quite a number of people with funky colored hair walking around recently. Curious to try something new, I started this adventure! I did most of the dyeing by myself, at home. I’ve gotten my hair bleached once professionally, and the rest was DIY. I did my research on what to do, read tutorials, watched YouTube videos. I am not a professional. There are dangers to doing this yourself!!!

Warning: This post contains a lot of pictures of my face. Hopefully, this doesn’t throw you off from reading the rest of this post.

 photo IMG_0852_zpsp7ntxhnf.jpg

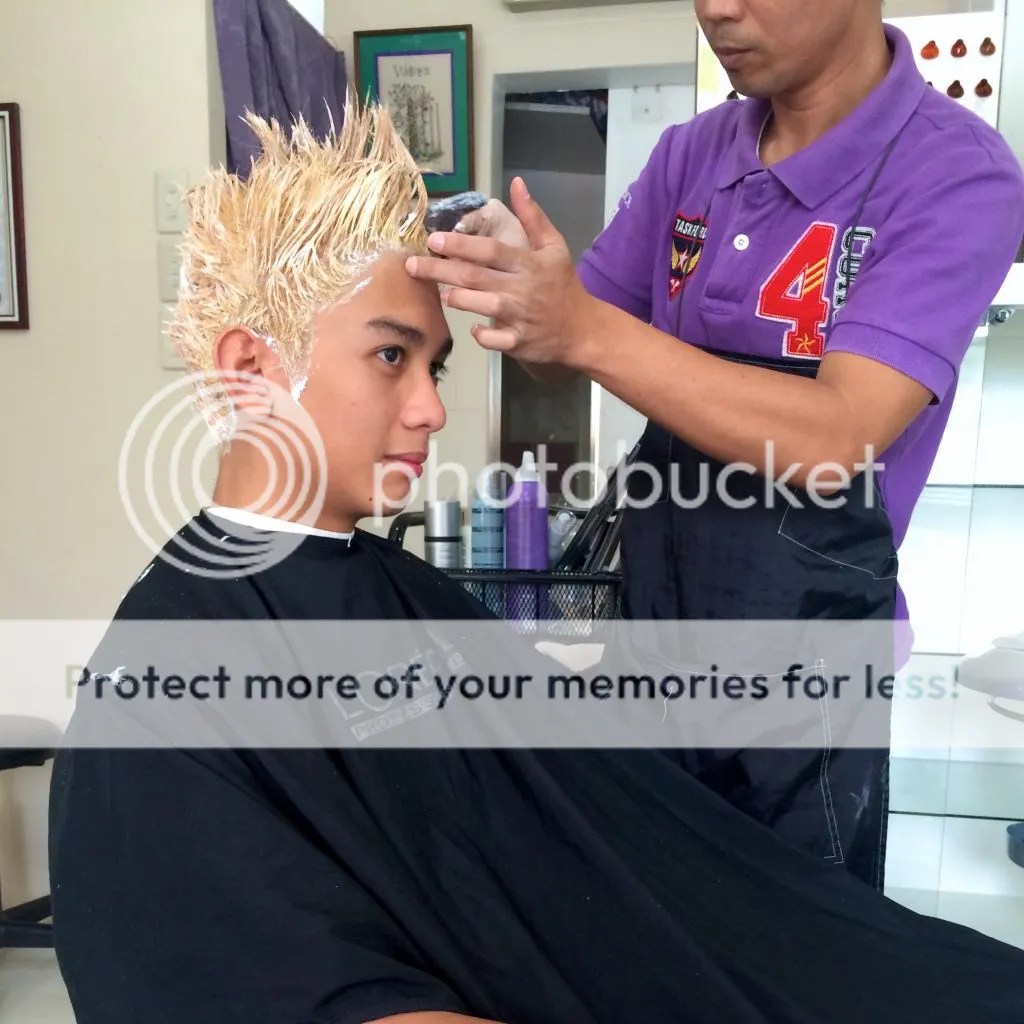
So, like most people, I have dark colored hair. Then one day, my friend tweets about getting her hair bleached, and getting it colored turquoise. Intrigued, I talked to her about. She linked me to this site. And that was the start of my fascination with semi-permanent hair dyes. I ordered myself a pot of Punky Apple Green, and Platinum toner. I then got my hair bleached at a place along Maginhawa street.

 photo IMG_1191_zpsgortxcdf.jpg

I’ve read that to get the best color from your hair dye, you should get your hair bleached to a pale yellow color. I don’t think I got to tell this to the people working on my hair so I ended up with a head of orange hair.

 photo IMG_1194_zpsgspu3ynf.jpg

I asked them to bleach it again, although I knew you weren’t supposed to bleach your hair twice in one sitting, and I walked away with hair that was still a bright yellow. I didn’t mind the color, thinking that the toner I bought would be able to make it less garish. I slathered the hair toner onto my dry hair, as stated in the instructions, and wrapped it with plastic wrap to keep the moisture in. I waited two and a half hours before washing it out. And it looked like this.

 photo IMG_1211_zpsiw0b55rw.jpg

Content with the color, I kept the blonde hair for a week or so, before finally opening my pot of green hair dye and trying that out. I read online that you could dilute and pastelize semi-permanent hair dye with white conditioner, I tried it out. It was my very first time dyeing my own hair, I put too much dye and not enough conditioner. Or maybe my hair was still too yellow for the green to look pastel. I put the mixture of conditioner and dye in my hair, wrapped in plastic wrap, and waited for another two hours. After washing it out with cold water, it looked like a clown’s wig, or fake grass, or anime hair. Call it what you want.

 photo IMG_1235_zps8ou8k3ga.jpg

I loved it. It was great. I finally had green hair. I kept the hair for a few weeks, and on my friend’s birthday decided to change it up a bit. I got my hair shaved on the sides and the back, and dyed the rest of it with undiluted hair dye. And it turned really green. This was even better than the first.

 photo IMG_1323_zpsikpz0t3d.jpg

But, I was just getting started then. I grew out my hair, and let the color fade.

 photo IMG_1323_zpsikpz0t3d.jpg

And I tried the ombre hair dye thing that seems to be really popular. And it turned out pretty nice. Could’ve been better, but hey, what could I do with one color of hair dye.

 photo IMG_1662_zpss60a1xua.jpg
 photo IMG_1681_zpsexz4zdlw.jpg

After a month or so of having that hair color, I had to get my driver’s license. Scared that they wouldn’t give me one with unnaturally colored hair, my dad asked me to get my hair cut. So, I did what I did, and I experimented. My sister bought herself some hair bleach a while back, and with nothing left to lose, I asked for some and died the front part of my hair. And it turned out like this.

 photo IMG_1783_zps9iifml8p.jpg

I read that you could also dye your hair with Kool-Aid or any powdered juice, and we just happen to have some around the house… Here’s what it looked like the following day.

 photo IMG_1790_zpsu40pu8ue.jpg

I went and got my hair cut, that day too. Although, the hairdresser insisted that I color my hair instead of getting it cut. And that’s what he did, despite me declining the offer. So, back to black hair for me.

 photo IMG_1799_2_zpsk5bdvfnb.jpg

A few weeks later, I got my driver’s license as well as hair bleaching supplies, and I got busy. Apparently, you’re not supposed to bleach hair that’s been dyed black. Don’t do it. Just, don’t. But, I was itching to get color back into my hair. This time around, I bought Sparks Electric Blue, and Purple Passion from Funky Streaks again. Let me just say that the Sparks dye is super pigmented. I barely put any in two tablespoons of white conditioner, and it still looks really bright. Please bear with me the horrors of what my hair went through the next few pictures. I bleached my hair on my own for the very first time. And it was not even. The tips were lighter in some areas, while the roots remained orange. I blame the black dyed hair on this one. But, what could I do.

 photo IMG_1874_2_zpsmhfabxuk.jpg

I tried toning it with diluted blue dye, and it turned grey and brown. It wasn’t that bad. It actually looked pretty cool . But, I wasn’t going to settle for this color. I wanted pastel blue this time.

 photo IMG_1884_zpsjiebpqef.jpg

A few days later, I bleached my hair again. It still wasn’t even. Some parts were light enough, while some were still really yellow.

 photo IMG_1902_zpski5qxrlz.jpg

I didn’t mind it and, again, slathered diluted blue dye on it hoping for the best. It turned a weird shade of green. I mean, the ends of my hair turned green, while the roots stayed golden brown. My hair wasn’t light enough.

 photo IMG_1920_2_zpsrqjkqslv.jpg

A few days after that… I bleached my hair again. It looked promising. It was quite a light yellow. But, I wasn’t sure if it was light enough.

 photo IMG_1932_2_zpsyz7fnvad.jpg

To tone it, I diluted some purple dye, and put that in my hair. And it worked… somewhat. Some parts were grey, mostly purple.

 photo IMG_1934_2_zps8mwl3uuo.jpg

I thought I could fix it by adding blue to make the grey parts mix in with the purple. I was wrong. It looked really weird. Now my hair had three colors. And I missed a few parts the back of my head. I didn’t have plans to leave the house, so it didn’t matter as much.

 photo IMG_1951_2_zps3uhp8jhj.jpg

I left my hair alone to recover for a few days. I then did a bleach bath, which is hair bleach mixed in with shampoo. It’s less damaging, but still very drying to the hair. I ended up having this light green hair. Cabbage hair. Everything was cool.

 photo IMG_1961_2 2_zpstykjnogu.jpg

I didn’t do anything to my hair for several days, and the hair dye faded into this weird grey green color. It wasn’t bad though.

 photo IMG_1968 2_zpsqa22bcv8.jpg

A few more days and I bleached it one final time.

 photo IMG_1970_2_zpsikvmqzxv.jpg

It looked light enough, so I mixed conditioner and purple dye and boom. Grey hair. Another hair color I can check of my checklist.

 photo IMG_1972_zps4puocohy.jpg

It wasn’t a pure grey though. Some parts were yellow, some were purple, but I wasn’t complaining.

 photo IMG_2012_2_zpsdczp5r7b.jpg

I left that for a week, or less, and decided to finally mix some colors together. And here’s what happened. I put the darkest blue where my hair parts on both sides, and as I got to the middle, I diluted it more and more. Beside the deepest blues, I mixed in some of that green dye from before. And that’s how I got my sea hair. And I kept that hair for the longest time.

 photo IMG_2043_zps9e3mdaxp.jpg

But, as semi-permanent hair dyes do, it faded. And I got my light blue hair.

 photo IMG_2078_2_zpsrw4isd4t.jpg

This time around, my mom asked me to color my hair for some other personal business. I didn’t want to pay big bucks for someone else to do it, so I bought myself a box of black hair dye from a drug store. By New Year’s Eve, I had black hair yet again.

 photo IMG_2237_zpsczle5rvn.jpg

I attended to said business, and went back to going wild on my hair. I got my hair cut, although, I don’t think I got it cut short enough to get rid of all the black dyed hair. I still haven’t learned my lesson. I tried out the bleach on the newly dyed hair and it didn’t react badly, so I continued on with it.

 photo IMG_2360_zps3wnozpf1.jpg

This time I just bleached once and continued to color my hair. I was planning on doing a blue purple ombre from both sides and this is how it turned out. Some parts were too yellow to be affected by the super diluted dye, so it turned green where I applied the blue, and it turned brown where I applied the purple. It turned out pretty rad.

 photo IMG_2374_zpsbclk8kqg.jpg

And again, I haven’t been touching up on it, so it has faded. It’s faded pretty nicely too.

 photo IMG_2397_zpsujhxkjce.jpg

Congratulations! You reached the end. That’s it from me for now. I’m planning to buy a few more colors of dye soon. Any ideas? Favorites? Don’t be afraid to leave comments or questions below!
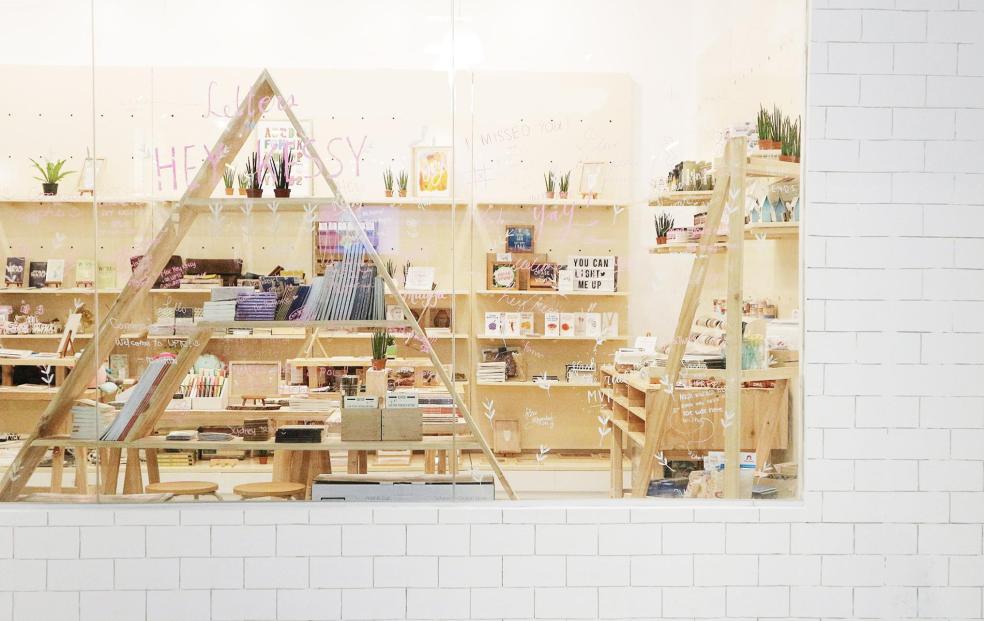
Handlettering 101.1: CALLIGRAPHY, BRUSH PENS, NIBS ETC. SUPPLY DIRECTORY for Manila, Philippines!

Hi! THIS IS AN OLD POST! Please go to our new site here!

Hello! Welcome to part two of our handlettering series. If you haven’t seen part one, you can do so here. Don’t you hate it when you want to start a new hobby and don’t know where to get or find the supplies you want, especially here in Manila, Philippines? I know I do, that’s why I created this calligraphy supply directory to help you out! This list will be updated so be sure to bookmark it for future reference.

(c) http://maglomaniac.com/

*Prices not included since they’re subject to change without prior notice I separated this by material, and at the bottom there’s a list with links for your convenience. Enjoy! NOTEBOOKS/PAPER Notebook of Infinite Patience (made for calligraphy, has guidelines) – Swirls And Strokes / The Fozzy Book Sunday Paper Simple Notebook (ideal for hand lettering and brush lettering, blank) – Sunday Paper Co. Paper One 100 gsm 1 ream (all three) – Select NBS Branches Blue Feather Notebook – NBS Rhodia – Fully Booked NIBS Vintage Nibs (has flex and non flex) – Ink and Manuscript Art Vintage flex nibs, nib organizers and other accessories- The Nib Junkie Modern nibs – Craft Carrot, Craft Central, Create Crafts PH INK Calligraphy ink, k – Hey Kessy, Scribe Fountain pen ink – Scribe, NBS, Saizen if you’re lucky (I found black refills at one point!) Sumi ink – Create Crafts PH India ink – Hey Kessy, NBS Walnut ink – Craft Central (they also sell walnut ink crystals) BRUSH PENS ZIG products – Craft Carrot, Swirls and Strokes PH, Scribe, Create Crafts PH Pentel Pocket Brush Pen- Deovir (they have stocks like once a year ugh), Create Crafts PH Faber-Castell PITT pens – Select NBS branches MUJI Waterbrush (that you can fill with ink) – Deovir Sakura Pigma brush – Artmedia Trading, Deovir ONLINE SHOPS (some are Instagram shops) Craft Carrot Craft Central Create Crafts PH Swirls and Strokes PH The Nib Junkie Ink and Manuscript Art Artmedia Trading Hey Kessy (has brick and mortar shop @Katipunan) The Fozzy Book BRICK AND MORTAR ONLY SHOPS Scribe National Bookstore Fully Booked Deovir Muji If you have any questions about a particular brand/tool and where to find it, please don’t be afraid to comment/message me! I reply relatively fast! *No this post is not sponsored, this directory was made using knowledge I have. Did I miss something, want your shop to be part of this list? Let’s be friends! Message us on FB or comment below! :)

Sweater Making

Hey! It’s been a while. It’s Adi writing another post to update you guys.  photo IMG_2217_zpsjozzhyej.jpg
If you didn’t know, I’ve become an out of school youth this past semester, but that’s not why I made this blog post! While my friends have been pulling all nighters studying for their exams and finals, I’ve been staying awake late at night to try and figure out how to knit a sweater.

 photo IMG_2229_zpszhlit7kh.jpg
It took me several mistakes, a few trips to Makati to resupply my yarn stash, one or two unraveling incidents, and a week and a half to start and finish my very first sweater. It was hard work, and a tiny bit of calculator punching, but it’s done!

 photo IMG_2143_2_zpsmxqh6gms.jpg
Of course, I couldn’t have done this without preparation. First of all, I did my research! I looked for tutorials, and guides on the internet. And this sweater was made using this as a guide.

 photo IMG_2231_zpstsoizqtl.jpg
Then, I made a small swatch of fabric using 6.5mm circular needles, and Red Heart Super Saver yarn, so that I know how many stitches and rows there are in one inch. I then started taking the measurements of my sweater using my hoodie as a basis. I merely just followed the guide, knitting how many rounds necessary. Once the body was done, I knit the sleeves. I put it all onto one knitting needle and followed the instructions on the underarm stitches. Now, the yoke and the neckline of the sweater was tricky. I had to unravel more than 60 rounds of knitting because of a miscalculation! So, be careful and double check your measurements and calculations. And after several hours of marathoning series while knitting, I finished it!

 photo IMG_2216_2_zpsz5rjxu2b.jpgThe sleeves are a little short, and the neck line was a little snug. It was my first sweater, I didn’t expect it to be perfect. But hey, I learned, and am ready to try cabled sweaters, and maybe ugly christmas sweaters, complete with reindeer and a Christmas tree in front? Crop top sweaters?

 photo IMG_2220_zpsqkwawp8k.jpg Disclaimer. I do not take credit for the video tutorial. I’d like to thank knitpicks for that, as well as the guide included in the description of the videos. Well, I hope try and make your very own sweater! Do shoot us a comment below or on Facebook if you make your own or if you have any questions! :)
 photo IMG_2160_2_zpscev0uzm7.jpg
 photo IMG_2139_zpskhc1zirz.jpg

Hand Lettering 101.0 : Introduction + Supplies

Hi! If you’re interested in hand lettering, then you’ve come to the right place. I’m here to teach you everything I know about hand lettering, starting from supplies. Now I am no expert at all, but I want to share the knowledge I have from attending workshops, reading blogs, and hours spent on Youtube and Skillshare. Hand lettering is growing in popularity nowadays because of that handmade aspect that most of us have lost in touch with because of the advent of technology and social media, where anything is accessible with a push of a button or two. It also has that organic appeal that you just can’t get with digital works. It’s also a very portable and flexible art which you can use for weddings, home decor, or even handmade stationery. Personally I use this skill to pimp out my planner or writing sweet little notes for people. I use hand lettering as an umbrella term for actual hand lettering, brush lettering, and calligraphy, although their actual definitions slightly differ. Hand lettering is the art of drawing beautiful letters, whereas calligraphy is the art of writing letters. (Edit: If that still confuses you, try this fabulous video to see how hand lettering is different from calligraphy) Brush lettering then sort of falls under calligraphy, except a different writing instrument is used.

Speaking of instruments, there are so many writing instruments available for your perusal, no matter which  of the three you want to try your hand in.

HAND LETTERING

hand lettering styles
Hand Lettering – pencil, eraser, fineliner: sakura pigma micron, unipin, artline

For this series though I’m going to give tips mostly on hand lettering and brush lettering, though I’ll touch up on calligraphy when I can.

 BRUSH LETTERING

IMG_6519
Water brush filled with black and sepia india ink (although the sepia can’t be seen)

Click here to see brush lettering with the use of an actual brush and watercolor paints.

CALLIGRAPHY

calligraphy
Hiro 41, india ink

 Hopefully the above three examples helped you differentiate the three more easily.

When it comes to cost, hand lettering is definitely the cheapest as you probably have all the writing instruments you already need: an eraser, a pencil, a ruler (optional), and a fineliner (a marker with a very small tip). The paper you use can be your everyday notebooks or short bond paper.

With brush lettering, you can either use a brushpen or a real brush and paints. If using brushpens, one really good one is usually enough for you to practice on with thicker paper. If you’re anything like me though, you hoard a lot of pens. A LOT.

IMG_6468
I told you it was a lot. From TOP L-R: water bucket for “art water” (Divisoria); watercolor palette (NBS); hand lettering ledger beneath (NBS); notebooks: Sunday Paper (online), Notebook of Infinite Patience (@swirlsandstrokesph); Typography Sketchbooks (Amazon) and 100gsm paper beneath (NBS); MIDDLE ROW L-R: Marvy Uchida LePlume 2 in yellow, blue, red (NBS); Dong-A gold poster paint (NBS); Speedball india ink in black (Deovir); Vallejo india ink in sepia (Hey Kessy); Windsor and Newton calligraphy ink in blue-black (from a workshop); Skyists 00 red sable paintbrush (Craft Carrot); nibs: (L-R) Tachikawa G (workshop), Hiro 41 crown nib (Craft Central, Hey Kessy), Hiro 40 blue pumpkin nib (Craft Central, Hey Kessy), Hunt 101 (workshop); eraser (NBS); BOTTOM ROW L-R: NBS Brush pen (brand got erased, maroon body); Artline caligrahypen 0.4 (NBS); Unipin fineliner (NBS); Artline fineliner (NBS); Pilot G-Tec 0.4 (NBS); Uniball Signo gel pen in white (NBS); Cheap water brush filled with india ink (Deovir); Generic Chinese brush pen (a friend); ZIG Wink of Stella in Grey/Silver (@swirlsandstrokesph); Zig Kuretake Cocoiro Letterpen kiwi body with mint green ink (@swirlsandstrokes); Muji mechanical pencil (Muji); ruler (NBS); Speedball straight and oblique nib holders (workshop but Hey Kessy carries them)

Here’s a sample sheet if you want to see how each pen writes:

IMG_6532

1. NBS Brush pen i don’t know what brand this is from, but it’s maroon with a black cap. It doesn’t make very thin hairlines, but I like using it for “juicy” or thicker script styles or for doing retro-esque styles. PHP: ~26-28 PHP @NBS. You can’t go cheaper than that.

cover 2IMG_6524

2. Generic Chinese brush pen – Personally found this pen a pain in my ass, it won’t make the strokes I wanted it to make! Maybe it’s because it was intended for a different style of calligraphy?

3. Marvy Uchida Permanent LePlume 2 – these water based markers are felt tipped and don’t make super fine hairlines, but these are the pens I first used to practice with. It really helped me figure out how to hold the brush pen to get the thick lines I want. PRICE: 99 PHP @ NBSIMG_6529IMG_6473

4. Zig Cocoiro Letterpen – this “brush” pen doesn’t really have brush fibers, and the tip is actually quite hard, but I really like how it writes. It’s good for smaller letters because the contrast is much more obvious. This is my favorite pen so far, and it makes really good hairlines! The picture below is from a collab I did with an orgmate. The lettering below is a post processed lettering done from the Zig Cocoiro LP. PRICE: 220 for 1 body and 1 ink @swirlsandstrokesph
cover

5. Uniball Signo white gel pen – for faking calligraphy in dark papers, this white gel pen isn’t as cheap as other gel pen colors at 120 pesos, but before I get my white ink and black notebook, this would do. Also great for practicing fake calligraphy.IMG_6469

6. Zig Wink of Stella – sparrrrkllyyy.  I really like this ink because it has a natural shading, and it sparkles! I also like how fluid the ink is and how thin it can write. I find that it can be hard to see though, both on light and dark paper. I also like the softness of the brush itself. PRICE: 220 PHP
IMG_6521

7. Marvy Uchida Le Plume – this is alcohol-ink based (think of Copics) which means they’re sort of pastel and translucent instead of opaque, so it’s great for layering, not great if you don’t write with one fluid stroke as the “seams” are more visible. Price: ~ 105 PHPIMG_6530

8. Various fineliners – I’m used to using Unipin because it’s what’s most available to me, but they say Artline is also a very good brand. Sakura Micron are the best once I’ve tried out of all three, though. I use these fineliners for hand lettering.

9. Waterbrush – I’ve seen it being used as a brush for watercolor where they put just water inside for on the go painting, but I also saw that you can fill it with ink itself like a real brush pen! 

10. Sakura pigma brush – I don’t know if it’s because of heavy use or improper pen position, but it frayed on me after only a few days of use. Fozzy had the same problem.

Out of all three, calligraphy is something I have a lot to learn from still, but I have 4 nibs! What are nibs, you ask? Well for dip pen calligraphy, you use a special pen holder and flexible nibs to get the script style you like. In dip pen calligraphy, inks are used. Personally, I have india ink and calligraphy ink, and have yet to try walnut ink, however I have tried using watercolor and thinned poster paint with great success. The nibs I have currently are Tachikawa G nib, Hiro 40, Hiro 41, and Hunt 101. I only recently found out how to use the latter 3, so I’ll do a separate blogpost on those when I get the hang of it. For beginners, G nibs are the way to go! For nibs and nib holders, I suggest going to these stores:

  • @inkmanuscriptart
  • @swirlsandstrokesph
  • @createcraftsph
  • craftcarrot.com
  • craft central
  • hey kessy also stocks on nibs.
  • I’ve only tried ordering from craft carrot, swirlsandstrokes, and hey kessy, but I think i’ll give the others a try soon.

(Watch out for a hand lettering/brush lettering directory I’m putting up soon!)
IMG_6533IMG_6534

Here’s a really great in depth article from jetpens if you want to get down to the nitty gritty technical stuff: http://www.jetpens.com/blog/guide-to-choosing-a-brush-pen-for-calligraphy/pt/621.

PAPER

Mostly a hit and miss depending on what kind of pen you’re using. For those who like loose paper, I use 90 or 100gsm paper, it holds up really well for calligraphy work too.

For those like me who prefer to have all your sketches and works in one place, notebooks are the way to go. I use Sunday Paper notebooks because of the quality of their paper and the student friendly price (180 for a really good blank notebook!!). If you have more cash to spare, you can try Rhodia pads since they hold even fountain pen inks really well. I’ve also heard Blue Feather notebooks work really well. Tip: The smoother the paper, the better as it bleeds less, or not at all. Just don’t let yourself be caught by the NBS people caressing their notebooks. I may or may not be guilty of this.

That concludes our first post for the series! Wow, that’s a lot. Don’t be overwhelmed though! Watch out for a directory of suppliers I plan on making and releasing soon, to help everyone out. Less headaches = more art.

Any tools you suggest I try? Did I miss anything? What tools do YOU use for your lettering? :) I know that it’s quite a lot of information to take in, so if you have any questions, or if you want me to try a particular writing instrument etc., please go ahead and shoot a comment below or on our Facebook page or my personal Instagram account!

*This post is NOT sponsored. Any brands you see here are bought based on what was available/peer suggestions. All opinions and supplies are my own.

Maginhawa Adventures 6: Breakfast and Pies

It’s Adi’s post this time around.
 photo IMG_7095 copy_zpssclnkneq.pngSo, a few weeks back, Celz and I decided to try out some sweet treats after other plans fell through. We journeyed from our meet up place at Katipunan to Malingap street near Maginhawa to have ourselves some breakfast, and maybe a slice of pie.
 photo img 1_zpsy3ewezlx.pngBreakfast and Pies is located beside Pino and in front of Don Day along Malingap street. They offer mainly, of course, breakfast, and you guessed it, pie.
 photo IMG_7036 copy_zps63pmru5q.png

Their breakfast items range from french toast, “Eggs Benny”, a design your own omelette, to the familiar longsilog with homemade longganisa served with aligue(crab fat), salted egg, a 5-minute egg, and atchara.

 photo IMG_7035 copy_zps19o3k3wx.png
 photo IMG_7037 copy_zpsg5e7jmni.png
 photo IMG_7038 copy_zpseuo1iuk6.png
 photo IMG_7040 copy_zpsdonlmg8k.pngThey also have cereal milk, which I guess is milk with some cereal in a bottle. Don’t you drink the milk left in the bowl after eating Koko Krunch, or Honey Stars? It’s delicious!

 photo IMG_7052 copy_zpsyjkh9lxp.png

Near the counter of the store are shelves with baskets filled with bread. As well as displays for their pies, cookies, brownies, and other pastries. The store itself caters to locals for their sources of cheese and yogurt. It’s really great to find people who support our local industries.

 photo IMG_7103 copy_zpscgluvfzo.png

 photo IMG_7053 copy_zpsaka763gw.png
 photo IMG_7050 copy_zpsmhf6v1ew.png
 photo IMG_7045 copy_zpseg36bhpv.png
 photo IMG_7056 copy_zpsba8jmzts.png
 photo IMG_7042 copy_zpsmyso1wrc.png

Onto our orders for that day. Being a pancake enthusiast and having a love for anything sour, I ordered the Lemon Ricotta Pancakes (165 PHP). With three pancakes topped with some ricotta cheese, and a glaze, one can taste the different flavors mixing together into a delicious breakfast. The combination of the salty taste of the cheese and the tangy lemon in the glaze enhance the individual flavors.

 photo IMG_7075 copy_zpsf3g9rb5g.png

Celz ordered the Thick Homemade Brioche French Toast (185 PHP). She was drawn to the promise of good cheese and a filling breakfast. The french toast was freshly prepared and still hot as it was served, as the ice cream had already melted somewhat by the time it got to our table. The sprinkling of pistachio nuts gave another level of texture to the soft and fluffy french toast and  the cold and creamy vanilla ice cream. Ice cream for breakfast? Then again, we are the country who eats chocolate in the morning in the form of champorado. Celz was full after several bites, and I had to finish off both plates. But hey, I wasn’t complaining.
 photo IMG_7067 copy_zpseycyrjrg.png
 photo IMG_7064 copy_zps3fjvvq7l.png

With Celz unable to decide between the Lemon Basil Fritz (75 PHP) and the Cranberry Celery Cooler (75 PHP), she convinced me to buy one so she could get the other. Both drinks were very vibrant in color and contained a lot of flavor. The fritz packed a punch of sour, almost enough to cause your lips to pucker, while the basil in the drink gave an almost minty after taste. The cooler on the other hand was more mellow. It tasted very earthy. Both Celz and I didn’t taste enough cranberry, but a lot of the celery. Both drinks give off a healthy vibe, seeming to have no added sugar.
 photo IMG_7078 copy_zpsogdgtzyh.png

We finished off the breakfast with a slice of Smack Pi (155 PHP), Breakfast and Pies version of Momofuku Milk bar’s Bestseller, Crack Pie. Great for anyone with a sweet tooth, no matter how small, the pie has a thin crust and a caramel like filling. Think condensed milk yema, baked into a pie. Super good! I was tempted to buy another slice to take home since Celz and I shared a slice. But sadly, the wallet didn’t allow it.

Jeezus, guys. Get the Smack Pi. I feel like you’d have to brush 3 times after eating it but it’s sooo worth it. -Celz
 photo IMG_7082 copy_zpsm0gmoa0r.png

At the end of the day, we were full and satisfied by the breakfast we had for lunch. Next time, we’ll try their more savory options, especially the homemade longganisa! This will soon be a stop for one of our pie hunts in the future.
 photo IMG_7100 copy_zpsjl8rlo4a.png
Breakfast and Pies (Price range ~200-400 pax)

Mon – Sun 7:00 am – 10:00 pm

* 39 Malingap Street, Teacher’s Village

* 1101 Quezon City, Philippines

Yarn Haul + A New Cat

Hey. Adi’s writing once again.

So, as a surprise for my youngest sister’s birthday, my mom decided to come back to the Philippines to visit. And as a surprise for me, she brought home a bag full of yarn.

With 6 different balls of yarn, my needles, a tapestry needle, and my cat right beside me, I was ready to knit.

I’ve made a black and white scarf, a multicolored circular scarf that can be wrapped up to three times, a shiny, metal looking pink and blue dinosaur beanie with gold spikes, a royal blue beanie with “#YOLO” embroidered on the front with gold yarn, and two simple multicolored beanies.

I’m sorry I don’t have pictures of the finished products. I hope the images of my cat will make up for that. You might see some of the things I’ve made in our shop in the future. So, stay on the lookout for posts and updates about that.

By the way, this is Twine. I got him from my friend’s cousin’s cat’s litter. Ain’t he a cutie. Well, he’s grown quite a bit already, and I just bought a laser pointer last week. He’s been chasing that across the floor since then. I hope he understands it’s all for fun and he doesn’t get mad at me. I’m off to go point lasers at walls for Twine’s exercise. Pew pew.